Welcome!
So, you want to build your first computer? Well, you sure came to the right place. Building computers is what I have decided to dedicate my existence to, so helping you out will be a breeze. To start off your pc building adventures, you will need to make your own list of parts using your knowledge of part compatibility that I am going to give you. It is necessary to do this because if you purchase incompatible parts, there is no way to use them together, and you will waste time and money if you make that mistake.
Compatibility
To start us off, it is worth mentioning that the two major manufacturers of CPU's are intel and AMD and, in my opinion, the only one is worth trusting. If you choose to go the AMD route, you will have to look for a motherboard with an AM4 slot, however if you go the Intel route, you will have to look for a motherboard with an LGA slot. This system can also be applied to the CPU cooling fans. Now you will have to look at the manufacturer's web page to see what generation of CPUs are compatible with whatever motherboard you choose or if a bios update is needed. Now that we are done with CPU and motherboard compatibility, there are not any more software compatibility issues for the most part (it is more of a fitting it into the case compatibility thing).
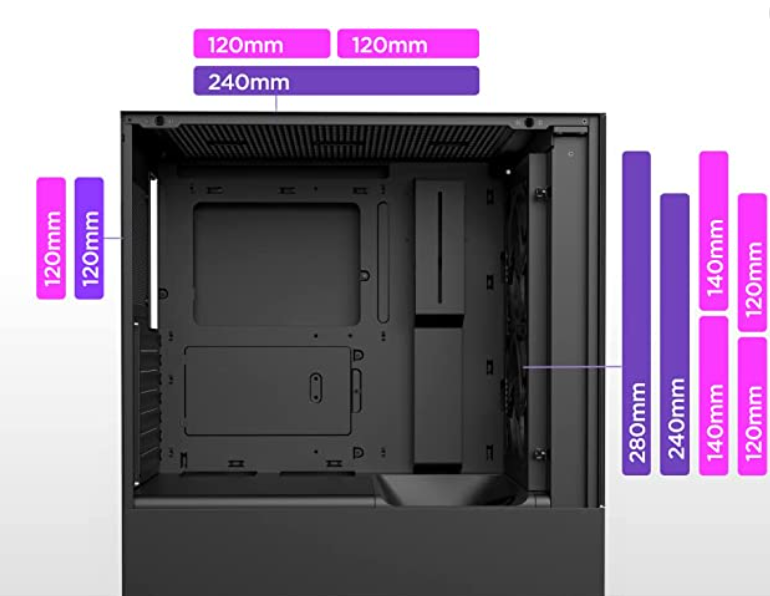
Let us move on to motherboard and case compatibility. Though in most cases a motherboard will fit fine, if you do have some concern over the matter, you can check the dimensions on the manufacturer's webpage or the distributors website (They will more than likely have the information in the description of the part) if you have any concern of the part not fitting. You can apply this method to the rest of the parts such as: The graphics card, Power Supply, Storage, Fans and so on. It is also fair to mention that once you get your CPU, GPU, and Motherboard you may need to update the software on them known as drivers.
What are Drivers?
It is also fair to mention that once you get your CPU, GPU, and Motherboard you may need to update the software on them known as drivers. You can download the drivers through the manufacturer’s website and only the manufacturer’s website or you will more than likely install a virus. You will need a flash drive with 8 gigabytes of storage or more to install the software. For that I have linked two YouTube videos for both bios & drivers, I see as extremely helpful. Again, only get drivers from the manufacturer's website or you will install a virus.
Budget Management
Now that we are all done with compatibility shenanigans, onto how to manage the budget that you have. I am going to use percentages because it works no matter the budget, and I can help more of a variety of people. To start off, you will want to put 25% of your budget towards the graphics card and 20% into the CPU as these should be the most expensive parts in your pc and the most powerful parts. Next up will be your motherboard, this should cost you around 15% of your budget. Along with your motherboard you will want to put 10% to the RAM, Case, HHD or SSD, and PSU EACH.
If you need to adjust the percentages because you want more of something and you found a cheaper part for the same overall value the other gave you, then do it. Need more storage space than a terabyte and you think you can move things around to fit that need? I can only encourage you to do so. Just make sure everything still follows their compatibility needs.
As for what amount of money will get you what quality of PC experience, I have a format that I have followed for a few years, though it will change with inflation and such. Now typically if you just want a computer for your workspace needs, emails, etc. You will want to spend around $250 dollars, however if you do not really need the computing power that a PC offers, I really recommend a laptop. If you want to get into gaming without spending very much money compared to a super spec'd out computer that a hardcore gamer just made. Then I would spend $500-$700, many say you cannot get a good computer for this price range, but I highly disagree, they just are not looking hard enough for deals.
If you want to be that hardcore gamer that cannot live without your high-end gaming experience, then I would say about $1,250 will land you that computer. I understand that the price is steep, but that is why there is always the cheaper option. And do not approach this situation like you cannot upgrade. There is always an opportunity to wait and be patient for an upgrade.
Building the PC
All right, on to the fun and stressful part. I say that because it typically never works the first time you press the power button. If it does, congratulations you no longer need me. Telling you how to build a PC is much more difficult than showing you how to build a PC because each part is different in some way. If you would rather watch a YouTube video at this part, I do not blame you whatsoever. All right now that those losers are gone, let us get to the PC building!
Items You will need:
To start your build, you will need a few items other than the parts. These items consist of:
- • A non-conductible surface
- This is needed so no electrical discharge can reach the part and potentially ruin them completely. For example, this could be a wooden table.
- • A non-conductible wristband
- This is also to stop electrical discharge, but strictly discharge caused by the builder.
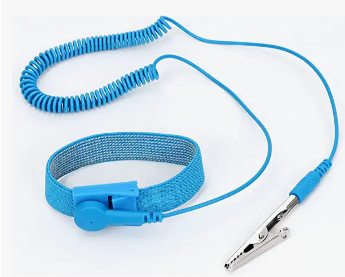
- • A ground to attach the wristband to
- This is to safely dispose of any discharge that would normally reach the parts through physical contact, but because of the wristband we attached to our ground this static is negated. For example, this could be the metal part of a desk (make sure the metal is not painted as well).
- • Thermal Paste
- Thermal paste is used to significantly reduce the temperature that a CPU would normally run at, which can be fatal to the part. Most of the time your PC will shut down due to overheating if you do not apply Thermal paste. You can easily find thermal paste on amazon or online in general.
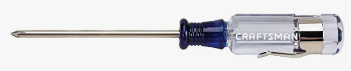
- • Phillips head Screwdriver
- A Phillips head screwdriver is what puts the whole PC together, if you do not have this you cannot build your machine. From the screws on the case to the motherboard are using Phillips head screws. Try to get a screwdriver that is about medium sized.
- • A USB with your desired version of windows
- This USB is used to install your desired operating system to your computer after your done with the hardware side of things.
- • Zipties (optional)
- Used to manage your PC cables
The Build
Now that you have everything that is needed, we can finally get our hands on some computer parts. I cannot stress it enough to handle with care, do not touch the direct top or bottom of any of these parts. And finally, double check if you have secured your wristband and ground properly.
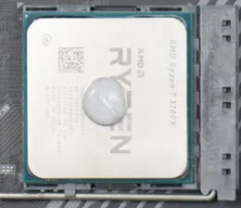
AMD
If you went the AMD route, on the motherboard you will see a little metal lever next to a box with tiny slots in it that looks like the picture below. That bar is stuck in place by locking system. To unlock it simply press down slightly and move it the opposite way of the box until you feel any major resistance and then pull up until it is completely vertical. After you complete the CPU installation steps below, put the bar back in place the same way you got it out.
Intel
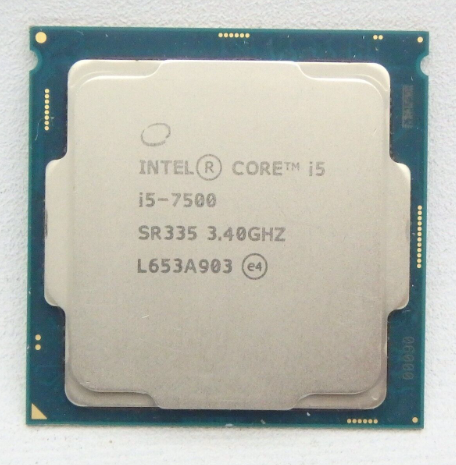
If you went the Intel route you will also see a metal lever, but it is slightly different than AMD. The bar is longer, there is a metal thing covering it, and there is a different locking system as well, however, there is no need to panic as removing the lock is arguably simpler than AMD motherboards. To unlock the lock simply slide the metal bar you previously located to the right until you feel any major resistance and then pull the bar up until it is completely vertical. After you complete the CPU installation steps below, put the bar back in place the same way you got it out.
CPU Installation
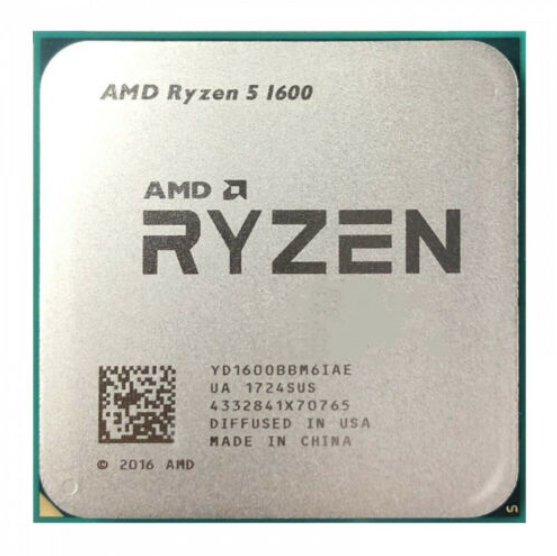
If you do not know what CPU type you have, all you need to do is look at the top of the CPU and it should specify what type of CPU it is and what generation it is. You will want to start with the motherboard as it is the place the CPU is installed. Carefully take it out of the box and its anti-static bag. Lay the bag on top of the box and then lay the motherboard on the bag. Depending on whether you went the AMD or Intel route you may see two different things on the motherboard. To better understand the installation process for your CPU and motherboard refer to the section above and come back when you have an even better grasp on it if you feel lost. Now that you have read up on your CPU type, we will talk about how to install it to your motherboard.
Now onto the CPU. When removing the CPU only touch the edges and none of the golden pins on the bottom. To install the CPU, look for an arrow that should be on the green edge. If you have not already noticed that same arrow will be on the motherboard. Line those two arrows so they are pointing in the same direction and place the CPU on top of the box with the tiny slots in it. Slowly move the CPU around until you feel it fall in place and of course put the locking system back into place. Well, Congratulations, you have just installed your first PC part. There is still a long way to go, but you have taken steps towards a final product.
RAM Installation
Now that your CPU is installed it is time to get your RAM situated. RAM is one of the scariest things to install into a computer mainly because of how hard you have to press to install it. While taking the RAM out of the packaging you are free to touch anything but the gold plating on the bottom. If you look at your motherboard, you will notice these vertical slots on it. Newer motherboards typically have 4 while older ones have typically have two. If you are having trouble just look to the image below for reference. But, after you have located them, you may notice another locking system. YAY! This one is extremely simple though. All you need to do is simply flip open the plastic lock on each end of the slot that you need to install RAM into.
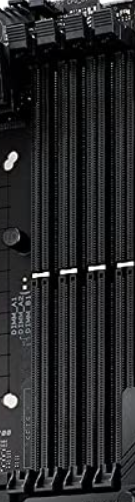
After you have done that, you need to do the scary part. In the middle of the slot is a little piece of plastic that keys the RAM, so you do not put it in wrong. Make sure you have it lined up properly or flipped the correct way before exerting force or it will break. When you have it lined up you need to push down with a little more force. Push down until you hear a click noise. That noise is the plastic lock going back into place. If you want the best performance possible there are certain slots you can put your RAM into depending on your motherboard. You can find which slots these are in your motherboard manual.
CPU Cooler Installation
After you have installed your RAM, it is time to install your CPU cooler. You may be wondering why we did not install the cooler when we installed the CPU; the answer is simple. Sometimes the cooler can get in the way of installing RAM and can make it a lot more difficult than it should be. Now to begin you will need to apply a pea sized dot of Thermal paste on the top of the CPU, nothing more than what is below. Now, many CPU coolers are different, but I can give some general advice about how to install them.
The most common coolers will have a big heat sync that will sit on top of the CPU while 4 screws will branch off and screw into the motherboard. while screwing these screws into the motherboard, alternate between the four evenly so the cooler does not topple over and potentially damage anything. Now that it is screwed in, it is time to plug in the CPU cooler's power cable to the corresponding pins. You can usually find the mapping for these pins in your motherboard manual.
Installing The Motherboard and I/O Shield to the Case
After you have installed everything necessary to the motherboard, it is time to carefully move the motherboard to the inside of your case. Before you do this, unpack your case, lay it down so the tempered glass or the left side is facing upright. This is the side the motherboard is to be installed into. After lying the case down, it is time to unscrew the side of the case. These screws will be on the back of the case, one on the top, and one on the bottom (you can typically use your fingers to undo these screws).

Make sure to find a safe place to put these screws. I suggest small bowls, or plastic container dividers. After you put away the screws you can slide the left side panel off the side and carefully put it away in a place where it will not be damaged. Before we put in the motherboard, you will need to apply your I/O shield. To apply your I/O shield you need to locate the open rectangle in the top left of the case. Make sure that you have it facing the right way, align it, and push on the edges until you hear a click, and it is properly aligned.
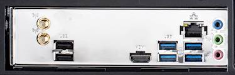
Now, time to install the motherboard. align the motherboard with the standoffs or screw holes and the I/O shield. After they are aligned properly you may screw the motherboard in using the screws that came with your motherboard. Screw until you feel any resistance whatsoever, repeat this until all the screw holes are filled, the motherboard is secured, and the motherboard's ports are visible through the I/O shield like below.
Installing your SSD
First off, you need to identify what type of SSD you have. Do this through a quick google search or checking the vendor's website. After you figure out your type of SSD find the corresponding section and follow those instructions. I will only be explaining Sata and NVMe SSD's as they are the most common.
Installing a Sata SSD
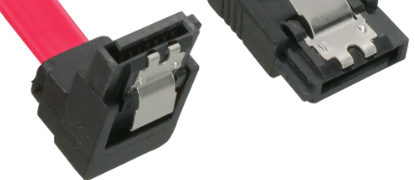
Sata SSD's can be attached to the back completely hidden or next to the motherboard for easy access. Personally, I would rather have it hidden on the back, so it looks cleaner and less cluttered. To attach the SSD, you will need to locate some screw holes on the back of it and screw each of them in until there is a little space between the head of the screw and the SSD. Now, it is time to connect cables before we attach it to the case. There are two cables that connect to this type of SSD. One is a Sata L cable and the other is your power. Your power is the big one, while your sata is the small one.
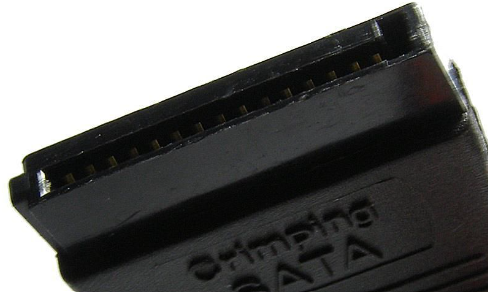
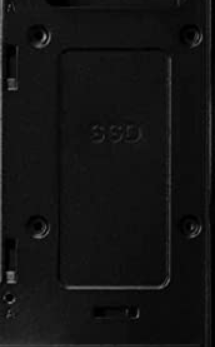
Once you plug those two in, find a SSD slot within your case and slide it into place (look below if you are unsure of where that is). After you have accomplished this, you must route your cables to the designated spot on the motherboard and power supply. We will start with the power sata cable. As I mentioned before the power cable for your hard drive is a big L keyed cable with multiple stringing off from one cable. That cable may already be attached to the Power Supply, however if it is not, find the corresponding plug on the power supply after installing it.
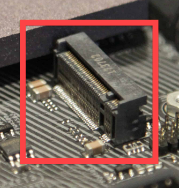
Installing a NVMe SSD
Installing your NVMe SSD is much different than installing your ordinary sata SSD or HDD. Before we begin there may be a protective piece of plastic covering the m.2 port. If you are not aware of where the m.2 port is, refer to the image below. After that, just remove the screws holding down the plastic and we should be ready for the installation. To get started, insert the golden edge into the port at a 30-degree angle. Once that is done, if your SSD came with a thermal pad to protect your SSD from overheating, apply that the same way you did the SSD. After that, hold the other end of the SSD down to the screw hole and screw until you feel any resistance.
Installing a HDD
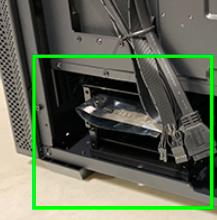
Installing your HDD is slightly more complicated than your regular SSD because there is a specific place in your case to put them, but it is the same basis. To start, locate your drive bay. A drive bay should be in the bottom right (It should look like two metal or plastic drawers). You may need to undo a few screws to take out the drawer, but after you do that, you should have no problem. Insert the HDD into the drawer so that the ports are facing you. Before you close the drawer, you will notice that the HDD has the same ports as the SSD. Apply those same rules that you learned previously. After that, you are free to close the drawer and re-apply any screws needed.
Installing a GPU
Installing your GPU is one of the simpler parts to install if not the most. All you must do is open one of your GUI slots on the back of your case. Some cases do you require you to break off a piece of the metal that cannot simply be put back. The slot that you break must be next to a GUI slot so make a final decision before you break any of them off. Once you have decided which slot to use, you may have to undo one screw to reach the GUI slots which will not be an issue, you will just need to put it back into place after you are done installing the GPU.
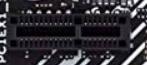
After that you will reach another set of screws, but all you need to do is unscrew the slot you wish to use. Once you remove the metal in the GUI slot you are free to align the golden plugs with the PCIe X 16 slots on the motherboard (The bigger ones). Push down until you hear an audible "click" or until it will not go down anymore, as you do not want to break the part.

Installing a Wi-Fi Card
Installing the Wi-Fi card has the exact same process as the GPU except you use the smaller PCIe slot rather than the big one.(PCIe x 16)
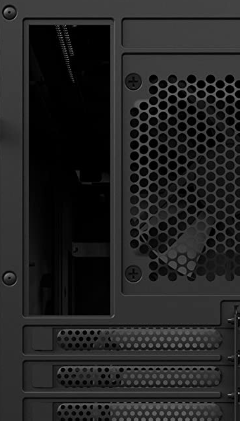
Installing a PSU
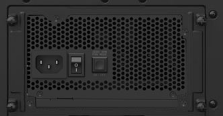
First off, the two manuals you will need are the motherboard and the power supply. You will need this to find the mapping of cables and find the power supply manual to do the same. After you complete all the mapping of cables it is time to install it into the case. To do this you will need to unscrew the metal PSU frame on the back to slide in the power supply (refer to below if you have no idea what I am talking about). Now you want your PSU fan facing downward, so it gets the cold air from outside to the inside of your case. You also want the side with the ports/cables to face inside the case because that would not make much sense would it.
After you slide your PSU into place, grab the metal frame you just removed and push it against the PSU. Use one hand to push the PSU against the frame and one hand to screw it into place. When screwing these in, screw them in evenly, little at a time.
Installing a Modular PSU
If you do have a modular power supply, (you have to manually connect each cable to the power supply) you do not want to install the PSU just yet. Map all your cables to your power supply before installing so you do not have to work in such a cramped space.
Cable Management
All right, the last and most annoying part of the entire build... Cable management. There is not much I can do to help but give you spots to hide wires. There is always the back of your case and under your PSU shroud. Never hesitate to hide wires back there as well as using those zip ties that are entirely optional. There are many holes between the back of your case and where your motherboard is. Those are meant to discreetly get rid of cables. One thing I do suggest is to not use too much slack to cables and not too little slack.
Made by Logan Reed
